
SecureMyEmail logoSecureMyEmail

Microsoft 365 security guide

Check SPF, DKIM and DMARC in Microsoft 365

A practical, step-by-step guide for Australian businesses. Reduce domain spoofing and improve email authenticity by implementing and enforcing all three email-authentication protocols correctly.

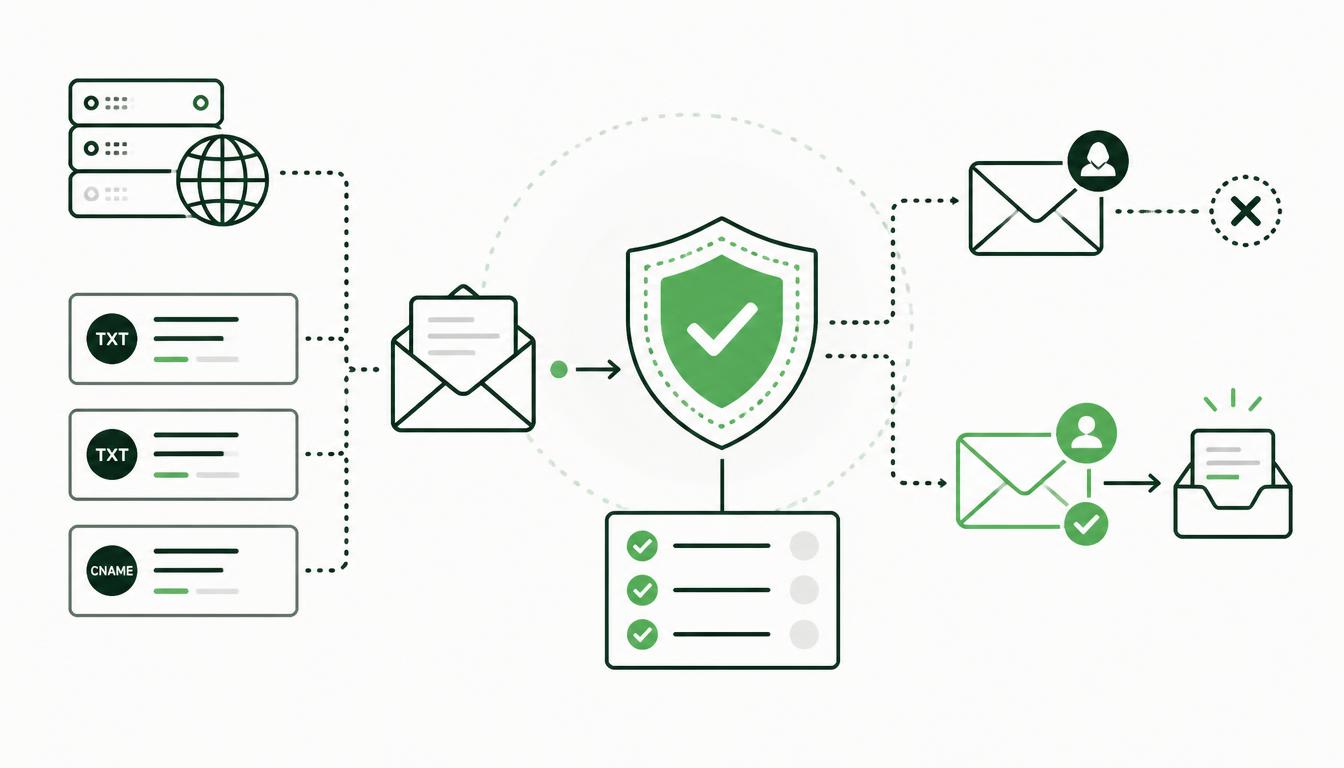
Microsoft 365 SPF, DKIM and DMARC email authentication schematic with DNS records and shielded domain

Recommended method: implement all three, then move DMARC to enforcement

SPF, DKIM and DMARC work together to reduce domain spoofing and improve email authenticity. Microsoft recommends implementing all three and gradually moving DMARC from monitoring (p=none) to enforcement (p=quarantine), with the eventual goal of p=reject. These changes must be completed for every custom domain and sending subdomain used by your organisation.

Before you begin

You will need:

  • Microsoft 365 Global Administrator or Security Administrator access.
  • Access to the domain's DNS hosting provider.
  • A complete list of systems that send email using your domain, including Microsoft 365, website contact forms, printers, scanners and multifunction devices, CRM, accounting and payroll systems, marketing platforms, ticketing, monitoring and backup systems, and third-party applications sending invoices, alerts or notifications.
  • A dedicated mailbox or DMARC reporting service to receive and analyse reports.

Before changing anything:

  • Export or screenshot the existing DNS records.
  • Record the current SPF, DKIM and DMARC values.
  • Confirm who controls the domain's DNS.
  • Identify all legitimate email-sending services.
  • Consider temporarily reducing relevant DNS TTL values to one hour.

Why this matters

SPF, DKIM and DMARC work together to reduce domain spoofing and improve email authenticity. Microsoft recommends implementing all three and gradually moving DMARC from monitoring (p=none) to enforcement (p=quarantine), with the eventual goal of p=reject.

These changes must be completed for every custom domain and sending subdomain used by your organisation. Gaps here let attackers spoof your domain to your own clients and suppliers — a very common finding, and one of the cheapest to fix.

1

Check the existing SPF record

SPF identifies the servers and services authorised to send email for your domain.

  • Sign in to the organisation's DNS hosting provider.
  • Open the DNS management page for the domain.
  • Locate the TXT record beginning with: v=spf1
  • Confirm there is only one SPF record for the domain.
  • Confirm every legitimate sending service is represented.
  • If Microsoft 365 is an authorised sender, the record will normally include: include:spf.protection.outlook.com
  • If Microsoft 365 is the only system sending email for the domain, Microsoft's recommended record is: v=spf1 include:spf.protection.outlook.com -all
  • If other platforms send email, obtain their exact SPF requirements and combine them into the existing record. Do not create another SPF record.
  • Save the record and wait for DNS propagation.
  • Test the published record using a DNS lookup tool and by reviewing the headers of a newly sent external email.

Microsoft recommends -all for Microsoft 365 domains once every legitimate sending source has been identified. SPF permits a maximum of ten DNS-generating lookups; exceeding this can produce a permanent SPF error.

2

Check and enable DKIM

DKIM digitally signs outbound messages and helps prove that a message came from your organisation and was not changed in transit.

  • Sign in to the Microsoft Defender portal.
  • Go to: Email & collaboration → Policies & rules → Threat policies → Email authentication settings
  • Select the DKIM tab.
  • Locate each custom email domain.
  • Select the domain to open its details.
  • Check whether the status indicates that Microsoft 365 is signing messages for the domain.
  • If DKIM is already enabled, confirm the status is valid and continue to Step 3.
  • If DKIM is disabled, attempt to enable Sign messages for this domain with DKIM signatures.
  • Microsoft will display the two CNAME records required for the domain.
  • Copy the exact CNAME names and destination values supplied by Microsoft.
  • The record names will generally resemble: selector1._domainkey and selector2._domainkey
  • Sign in to the DNS hosting provider.
  • Create both CNAME records using the exact Microsoft-provided destinations.
  • Save the DNS changes and wait for the records to propagate.
  • Return to the domain's DKIM settings in Microsoft Defender.
  • Enable Sign messages for this domain with DKIM signatures.
  • Confirm the domain reports that Microsoft 365 is signing DKIM signatures.
  • Repeat this process for every active custom domain or sending subdomain.

Do not manually construct the destination values from an old example. Microsoft introduced a newer DKIM record format for some domains, so the exact values should be copied from the Defender portal.

3

Check the existing DMARC record

DMARC tells receiving mail systems what to do when a message fails authentication and provides reporting about services using your domain.

  • Open the domain's DNS management page.
  • Locate the TXT record at: _dmarc.yourdomain.com
  • Confirm there is only one DMARC record for the domain.
  • Check its current policy.
  • Confirm the record includes an aggregate reporting address using rua=.
  • Confirm that the mailbox or reporting service is operating and monitored.
  • Review the reports and identify every sending source.
  • Confirm legitimate sources pass either aligned SPF, or aligned DKIM.

A message passes DMARC when at least one of these aligned authentication methods succeeds. Merely seeing spf=pass or dkim=pass is not enough if the authenticated domain does not align with the visible From address.

DMARC valueMeaning
p=noneMonitor failures but request no DMARC-specific action
p=quarantineAsk receivers to quarantine or mark failing email
p=rejectAsk receivers to reject failing email
4

Review DMARC reports before enforcement

Do not move directly to quarantine or reject without reviewing the monitoring data.

  • Collect DMARC aggregate reports while the policy is p=none.
  • Review reports over a representative business period.
  • Identify every IP address and service sending mail for the domain.
  • Classify each sender as: Authorised and correctly configured, Authorised but failing alignment, or Unknown or unauthorised.
  • Correct authorised failures by updating SPF where appropriate, enabling custom-domain DKIM in the sending platform, configuring an aligned return-path or MAIL FROM domain, or moving third-party marketing email to a dedicated subdomain.
  • Test website forms, invoices, marketing campaigns, scanners and automated alerts.
  • Only continue once normal business email consistently passes DMARC.

Microsoft recommends regularly reviewing aggregate reports and using a reporting platform if the raw XML data is difficult to interpret.

5

Move DMARC from monitoring to quarantine

DMARC for a custom domain is changed at the DNS hosting provider, not in the Microsoft 365 portal. A staged rollout reduces the risk of blocking legitimate email.

  • Stage 1 – Quarantine 10%: Update the existing _dmarc TXT record to: v=DMARC1; p=quarantine; pct=10; rua=mailto:dmarc@yourdomain.com (replace dmarc@yourdomain.com with the monitored reporting address).
  • Save the DNS record, confirm that only one DMARC TXT record exists, wait for DNS propagation, and verify the published record.
  • Monitor reports and delivery problems.
  • Stage 2 – Increase enforcement: If no material legitimate-email problems appear, progressively change pct= to 25, 50, 75, then 100. Allow sufficient monitoring time between changes.
  • At full quarantine, the record would be: v=DMARC1; p=quarantine; pct=100; rua=mailto:dmarc@yourdomain.com

A receiving system might place failing email in quarantine, deliver it to Junk Email or otherwise mark it. The receiving system ultimately decides how the requested policy is applied.

6

Move DMARC from quarantine to reject

Once quarantine is at 100% and reports show that legitimate mail is correctly authenticated:

  • Change the policy to reject at a low percentage: v=DMARC1; p=reject; pct=10; rua=mailto:dmarc@yourdomain.com
  • Monitor DMARC reports and investigate delivery complaints.
  • Progressively increase enforcement: pct=25, pct=50, pct=75, pct=100.
  • The final recommended enforcement record will resemble: v=DMARC1; p=reject; pct=100; rua=mailto:dmarc@yourdomain.com
  • Verify the published record after every change.
  • Continue monitoring DMARC reports after reaching reject.
  • Repeat the process for other sending domains and subdomains.

Microsoft recommends a gradual progression from p=none, to p=quarantine, and finally to p=reject, addressing legitimate failures throughout the rollout. Microsoft also recommends beginning with lower-volume or less complex domains and leaving the main parent domain until last.

7

Perform final testing

  • Send messages from Microsoft 365 to external test accounts.
  • Send messages from every third-party application.
  • Examine the received message headers.
  • Look for results similar to: spf=pass, dkim=pass, dmarc=pass.
  • Confirm that the DKIM signing domain aligns with the visible From domain.
  • Confirm automated messages, invoices, web forms and campaigns are delivered normally.
  • Review Exchange Online message traces for unexplained failures.
  • Document the final DNS records, authorised sending systems, DMARC reporting destination, testing performed, and date and person responsible.
  • Schedule ongoing DMARC report reviews, especially after introducing a new mail service.

SPF warnings

  • Do not replace the SPF record without identifying every authorised sender.
  • Missing services may cause legitimate messages to fail authentication or be rejected.
  • Never publish multiple SPF records for the same domain.
  • Do not 'flatten' Microsoft's include:spf.protection.outlook.com into IP addresses because Microsoft's infrastructure can change.
  • Website servers and multifunction devices are commonly overlooked.
  • Adding too many include: entries can exceed the ten-lookup limit.

DKIM warnings

  • Do not enable DKIM until both CNAME records have been published correctly.
  • DKIM must also be configured separately in third-party platforms that send as your domain.
  • A third-party service signing with its own domain may pass DKIM but still fail DMARC alignment.
  • DNS records may take several hours to become visible.
  • Deleting active DKIM selector records can cause authentication failures.
  • Each domain and sending subdomain must be assessed separately.

Important warnings

  • Moving to p=quarantine or p=reject before identifying all legitimate senders can interrupt business email.
  • A p=reject policy may cause legitimate but incorrectly configured messages to be rejected during SMTP delivery.
  • Forwarding services and mailing lists can break SPF and may modify messages in ways that break DKIM.
  • Receiving mail systems are responsible for applying your DMARC policy; behaviour can vary.
  • Changing SPF, DKIM or DMARC does not protect compromised user accounts by itself.
  • A service must not be added to SPF simply because it appears in a DMARC report. Verify that it is authorised first.
  • Maintain relaxed alignment defaults unless there is a tested business reason to use strict alignment.
  • Subdomains can inherit the parent DMARC policy. Check all subdomains before enforcing the parent domain.
  • Do not leave DMARC reporting unmonitored. Authentication problems can appear when suppliers change infrastructure or new applications are introduced.

Microsoft 365 disclaimer

These instructions provide general security guidance and are not a substitute for an assessment of your organisation's domains, mail flow and third-party sending services. DNS and email-authentication changes can delay, quarantine or permanently reject legitimate business email if configured incorrectly.

Before applying quarantine or reject enforcement, have a qualified Microsoft 365 engineer identify every authorised sender, validate SPF and DKIM alignment, review DMARC reports and prepare a rollback plan. Netlogyx/Securemyemail accepts no responsibility for email loss, delivery interruption, DNS errors or other consequences arising from changes performed without appropriate technical assessment, testing and monitoring.